If this page seems out of date, please submit a comment at the bottom.
Add Windows Printers
- Josh Smith (Deactivated)
- Wesley Wilson
Windows Computer or Remote Desktop
To add a printer to your computer or remote desktop, please follow these steps:
Go to the copier/printer location of the device you want and note the CSU Tag# for Step 4.

Alternate Option
If you cannot get to the copier. In step 3 one can change to the Details View and see the description for the copiers. In the Menu Bar click View. Then select the Details option in the window.
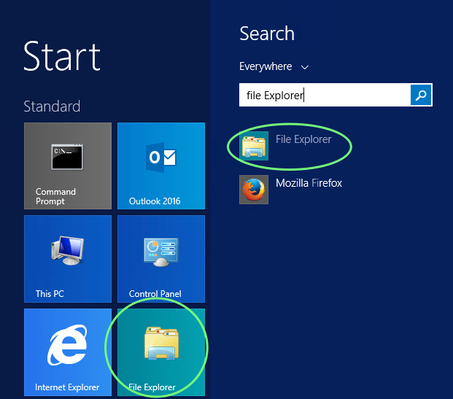
- Open a File Explorer window from either of these locations...
- The Windows Toolbar

- The Start Menu - the left image is our desktops with Windows 10, the right image is Remote Windows Desktops
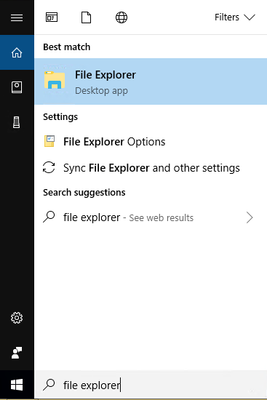
- The Windows Toolbar
- In the address bar type the following: \\print.clarkssummitu.edu
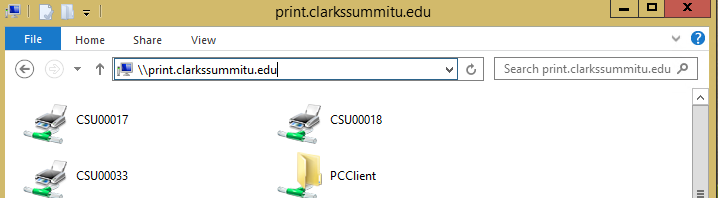
From the grid of printers shown, double click the number which corresponds to your desired printer (see Step 1).
Hint
From the menu ribbon, change the View to Details or hover your cursor over the printers and a printer location description will appear.
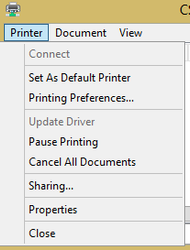
The printer will be installed and its printing queue will appear.
- Optional Step: Set the printer as default
- From the now open printer queue window click Printer

- Click Set As Default Printer
- From the now open printer queue window click Printer
Additional Apple Support Documents:
http://support.apple.com/kb/HT3049 (Connect to Windows Printer)
http://support.apple.com/kb/HT1568 (Connect to Windows Share)
http://support.apple.com/kb/PH7116 (Connect to Windows Share)